Role: Designer
Dates: 2022
Timeline: 1 week
Dates: 2022
Timeline: 1 week
Digital Fabrication
Why buy a lamp when you can make your own?
With this project, I was most excited about the idea of designing and fabricating an object that was both functional and beautiful. Although the final form is fairly simple, the process of constructing a kit of parts that snapped to fit and held firmly together was a significant challenge for a 3d printing novice like me.

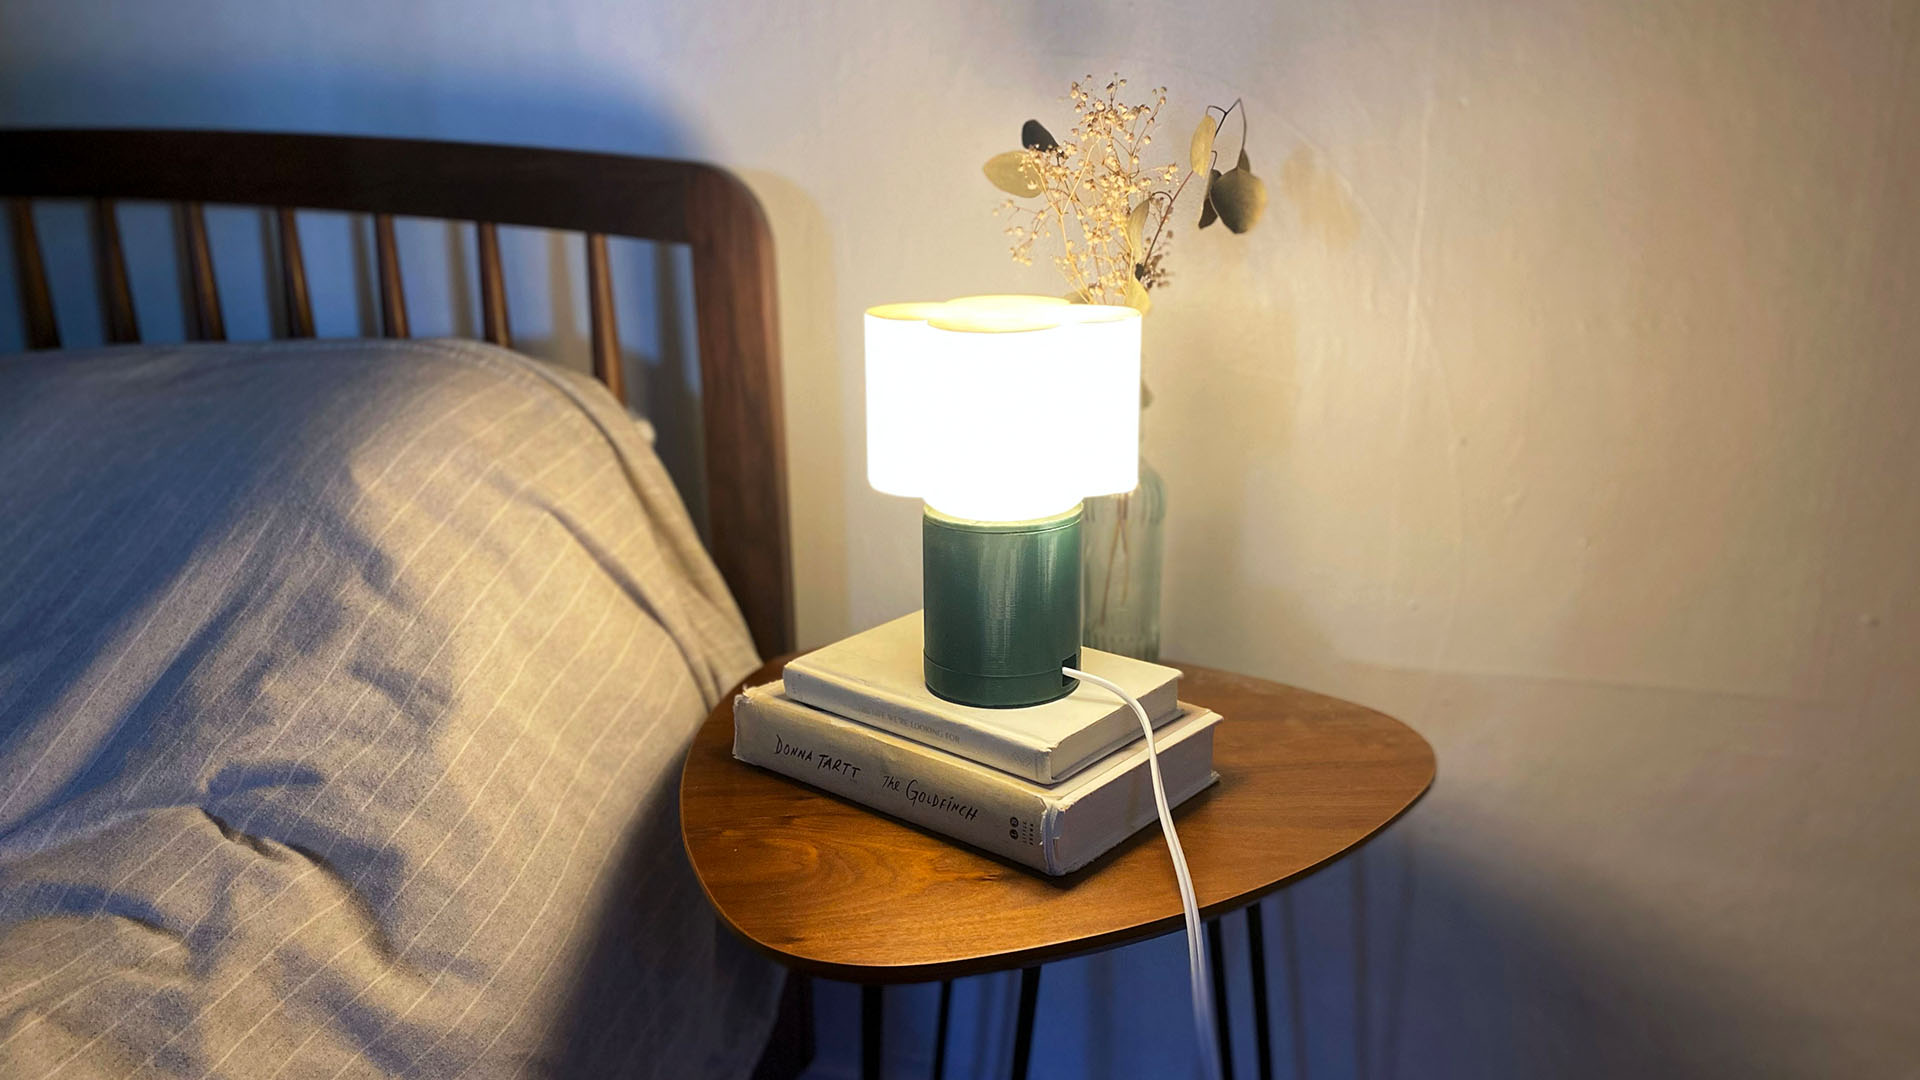
︎︎︎ The finished lamp in all its luminous glory ✨
Design Process
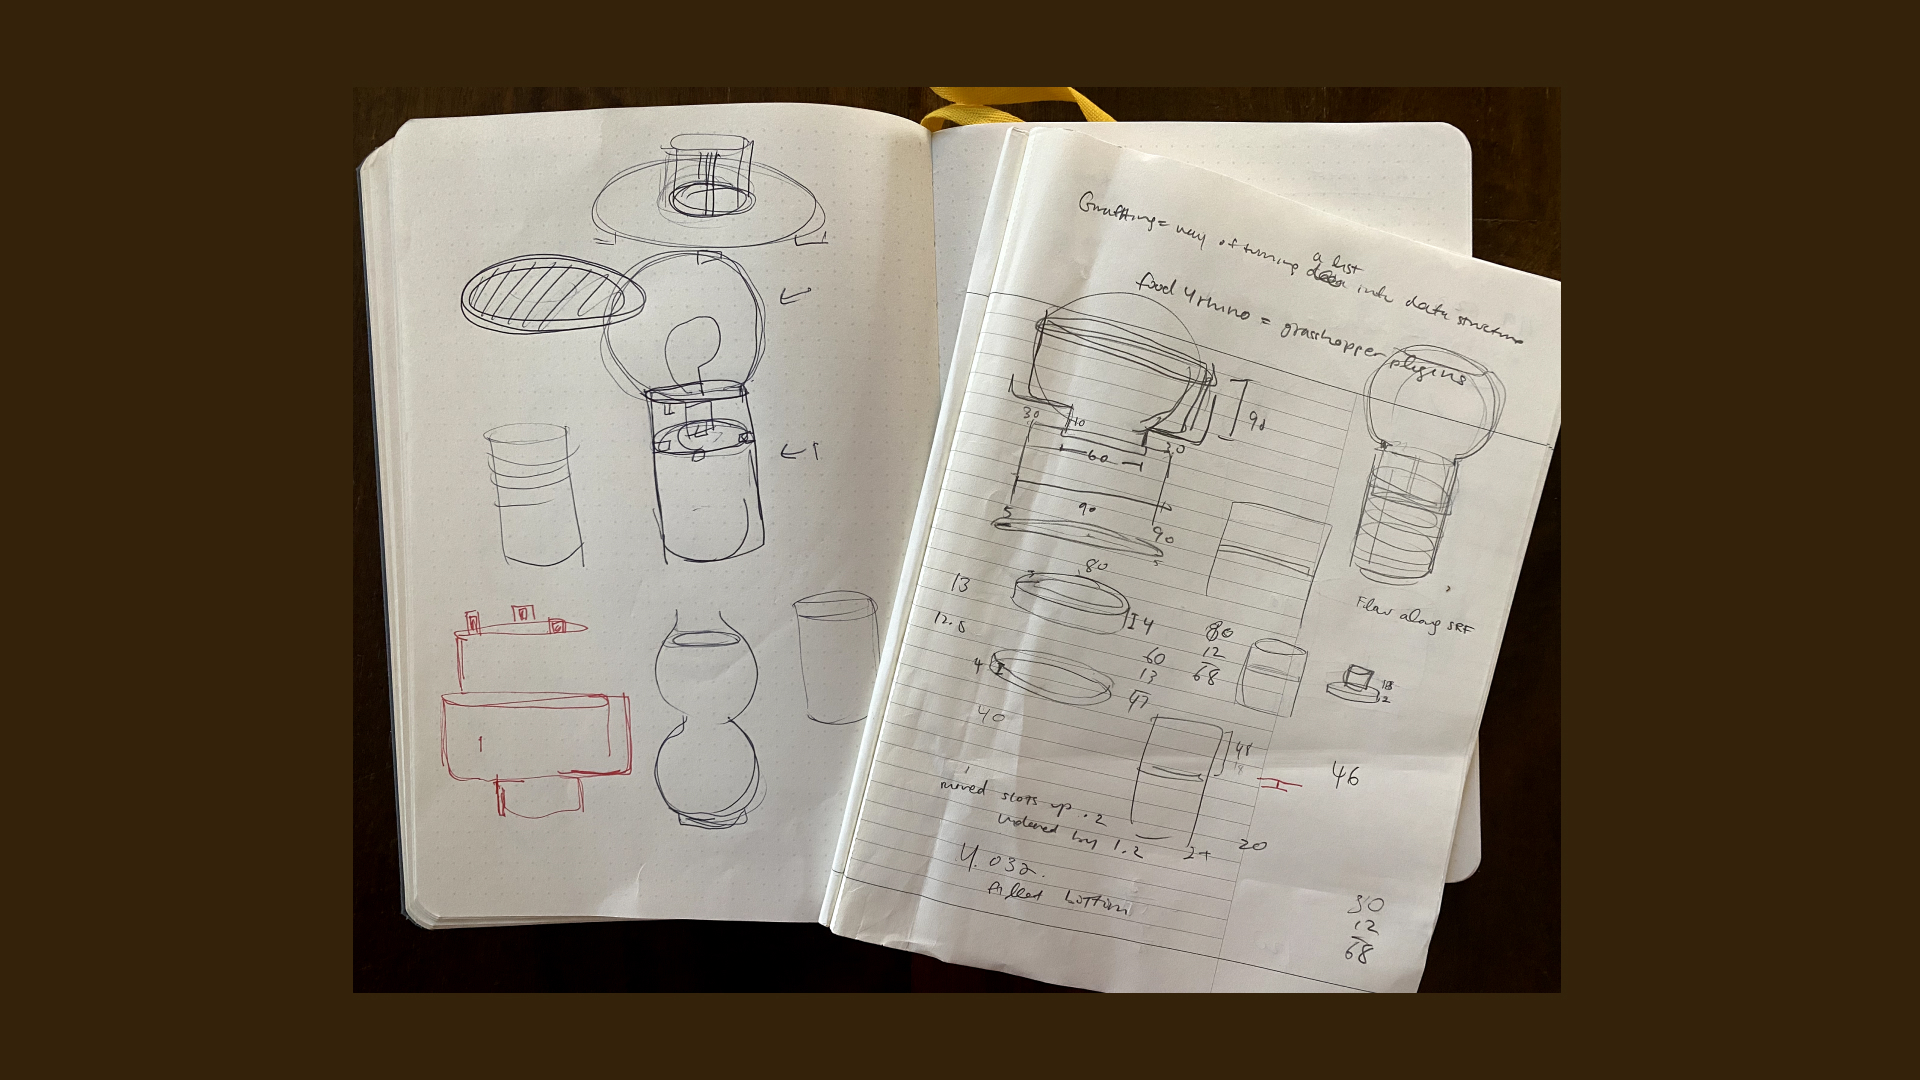 ︎︎︎ INITIAL SKETCHES / The phase in which I was grateful to have remembered how to do basic math.
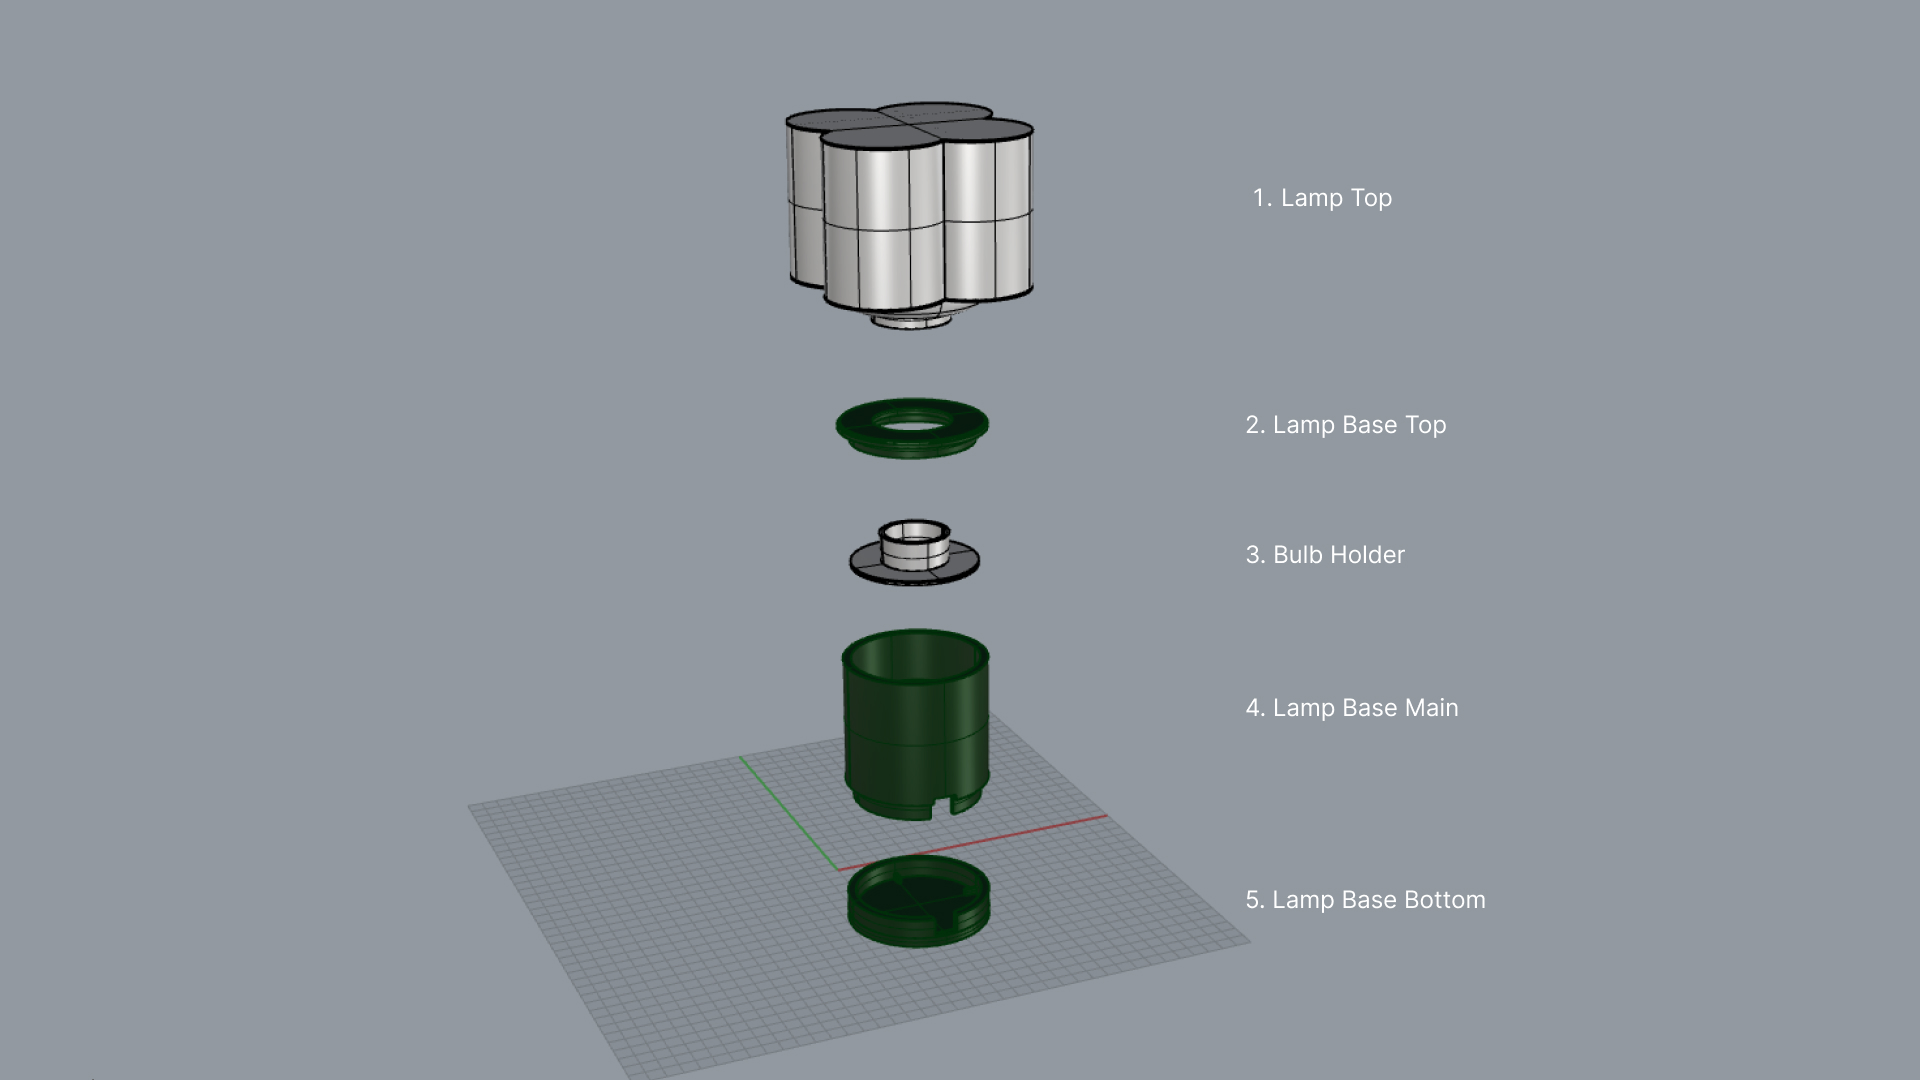
︎︎︎ LAMP ANATOMY / I modeled the lamp components in Rhino using an intricate concoction of surface, boolean, and transform commands.
 ︎︎︎ INITIAL TEST PRINTS / Nervous about the time cost and the unpredictability of the design to print translation, I made a few design test prints of the smaller pieces to start and printed short sections of the other pieces to test for fit.
.
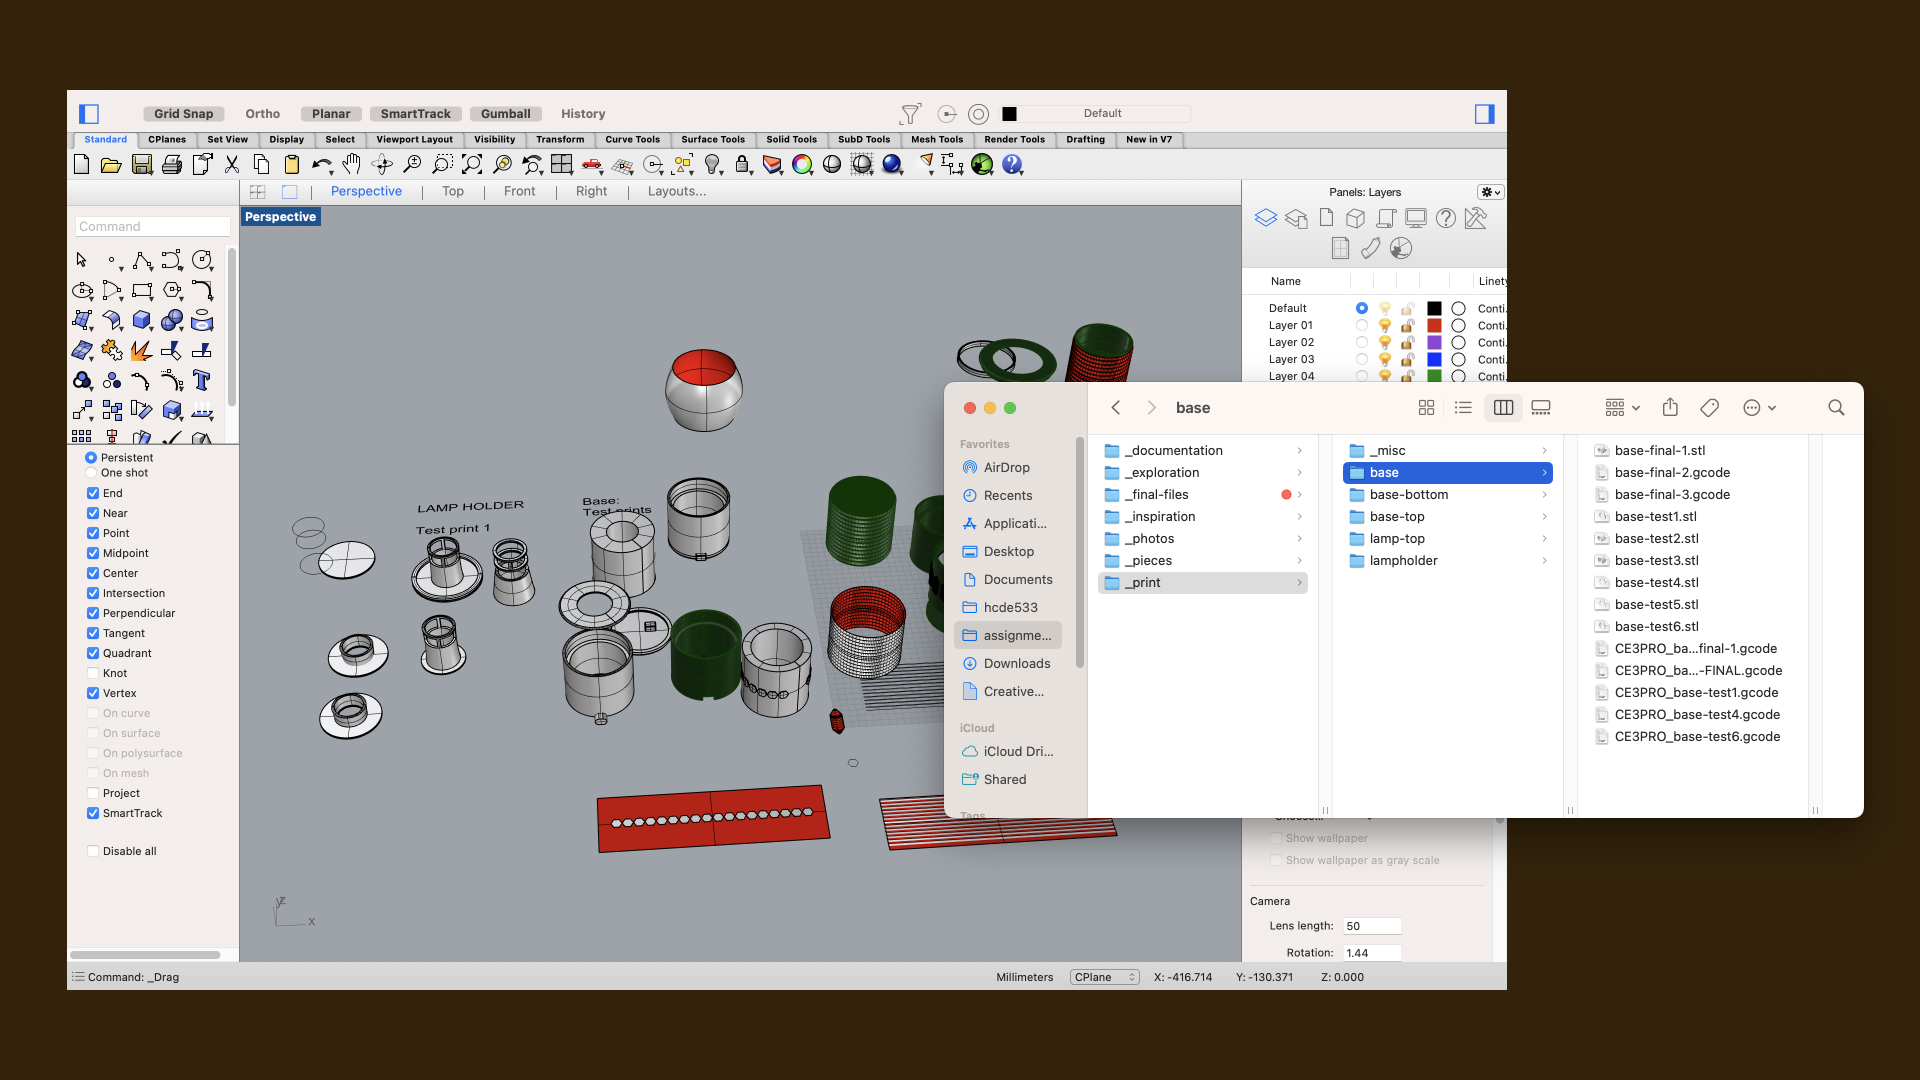 ︎︎︎ TRIAL AND ERROR / It took a lot of trial and error to get the measurements of each component exactly right to ensure that the entire lamp could be taken apart and put back together easily.
 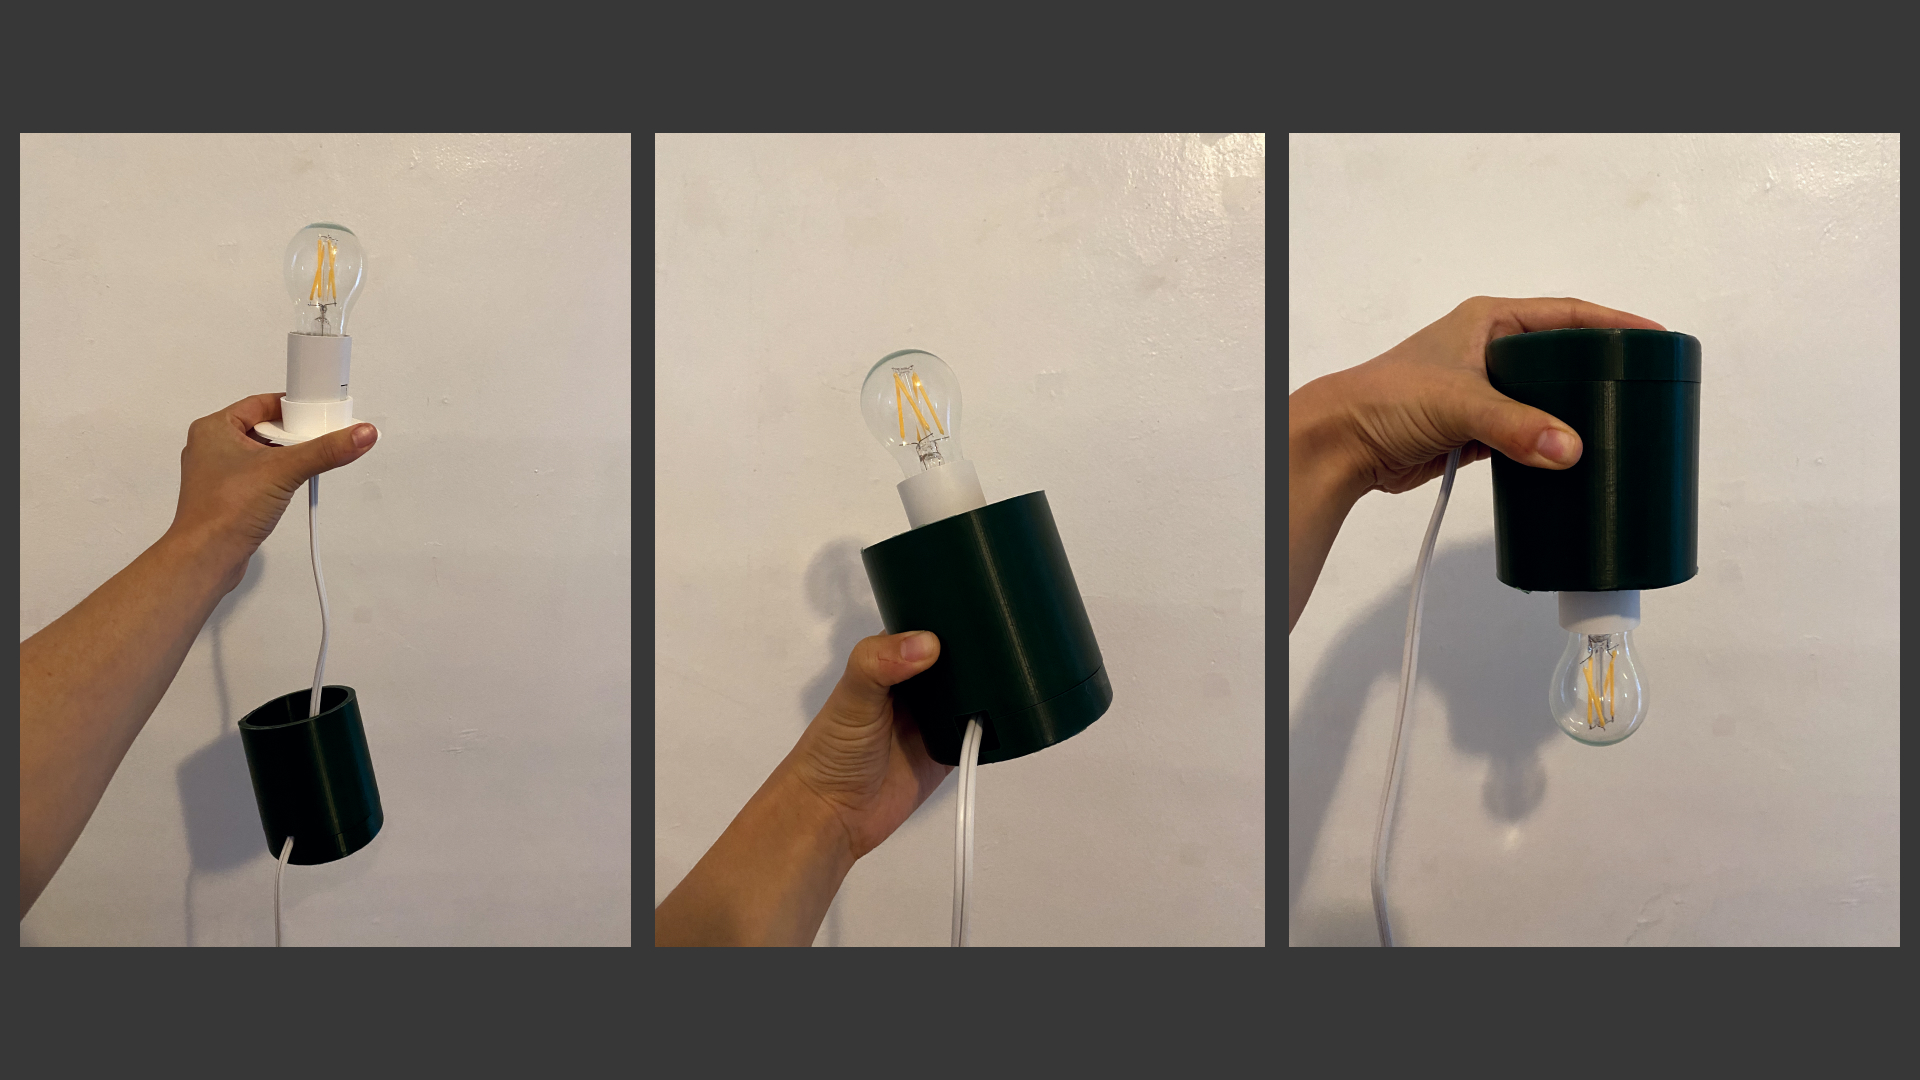 ︎︎︎ PUTTING IT TOGETHER / The lamp base component alone took 10.5 hours to finish printing, so you can imagine the anxiety I was feeling in this moment. Ahhh~ the satisfying sound of the parts snapping into place. The goal was for the lamp parts to stay together even with a light shaking
.
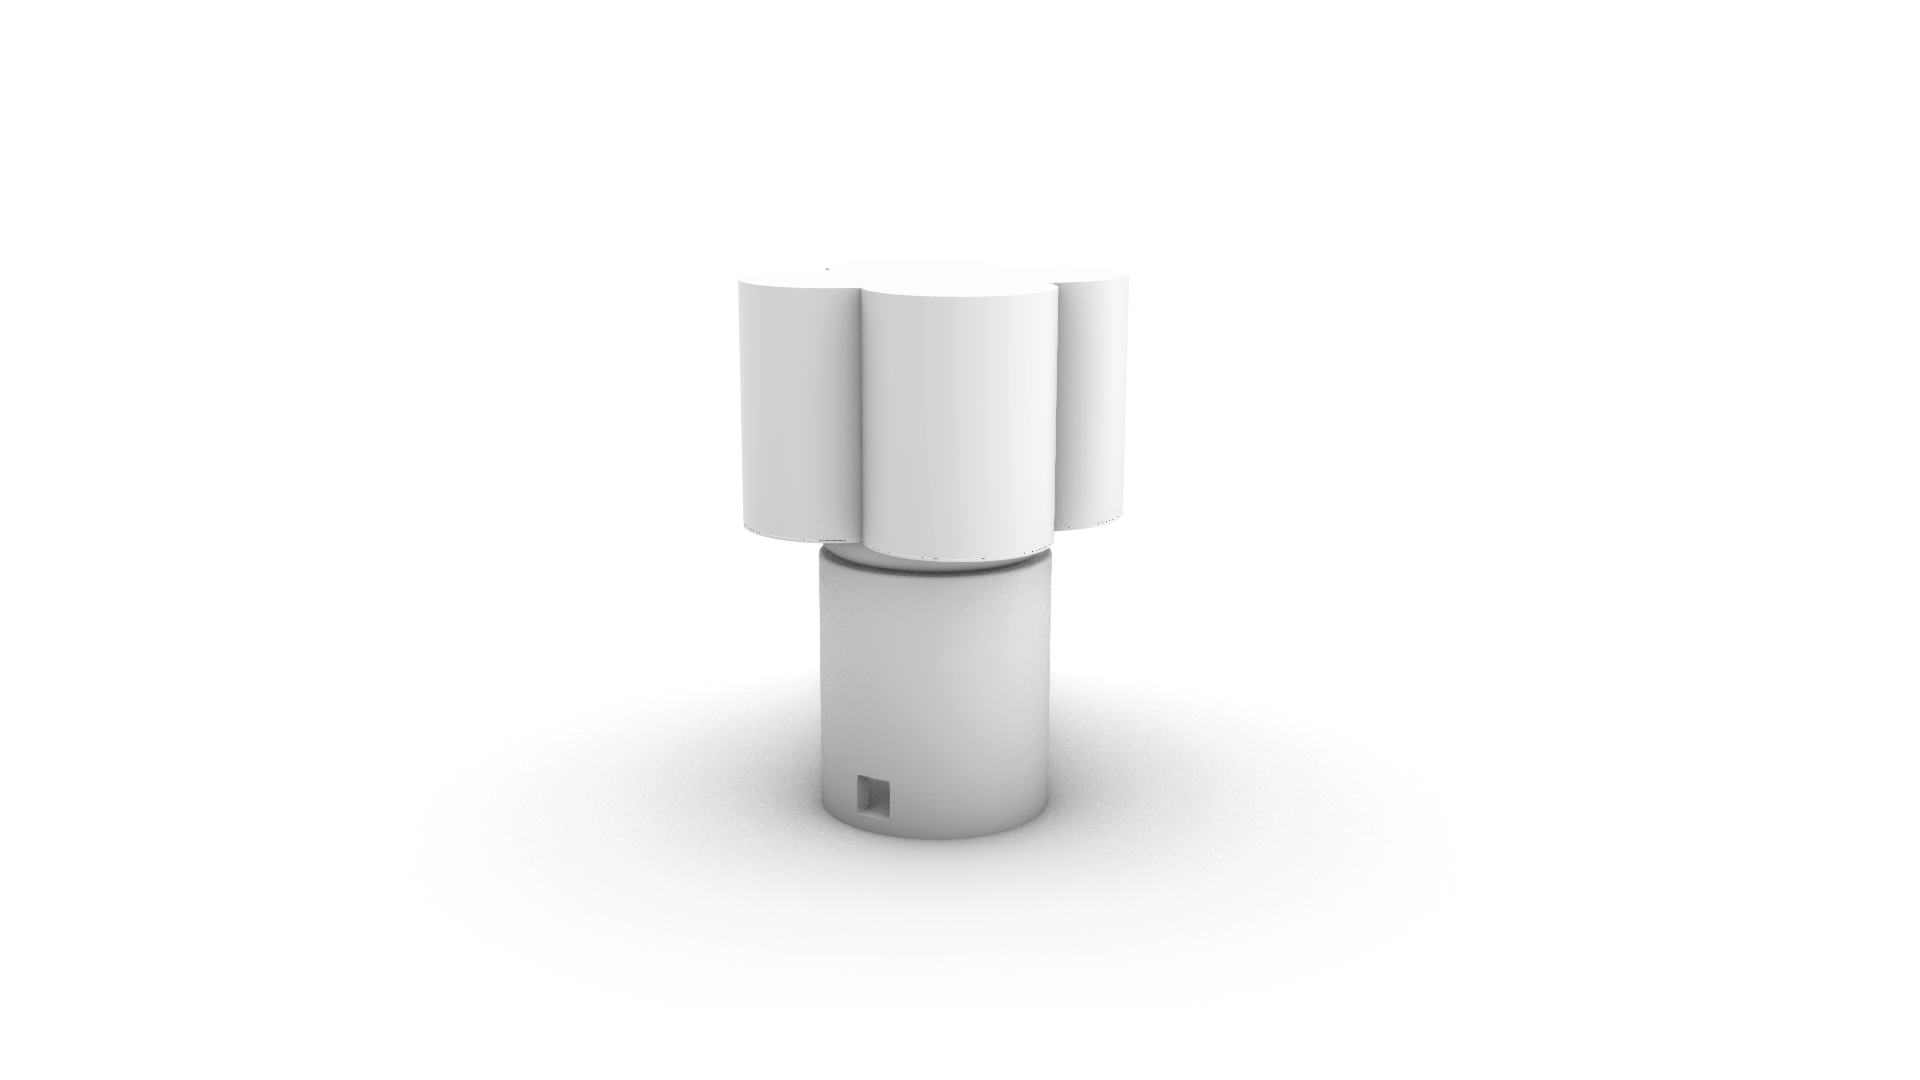

︎︎︎ LAMP PERSPECTIVES

Tools used: Rhino, Cura, Ender 3 Pro
Cura settings: I printed at standard quality using default cura settings with brim and support where necessary.
Filament: Forest Green PLA from Hatchbox (Lamp base), Simply White PLA from Protopasta (Lamp shade)
Source files: TBD